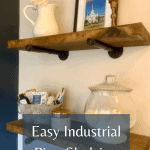
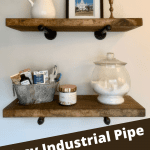
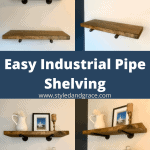
Easy Industrial Pipe Shelving
Like the look of industrial pipe shelving, but don’t want to pay the price for it? I’m sharing how you can easily create the look on your own with just a few items and a few tools.
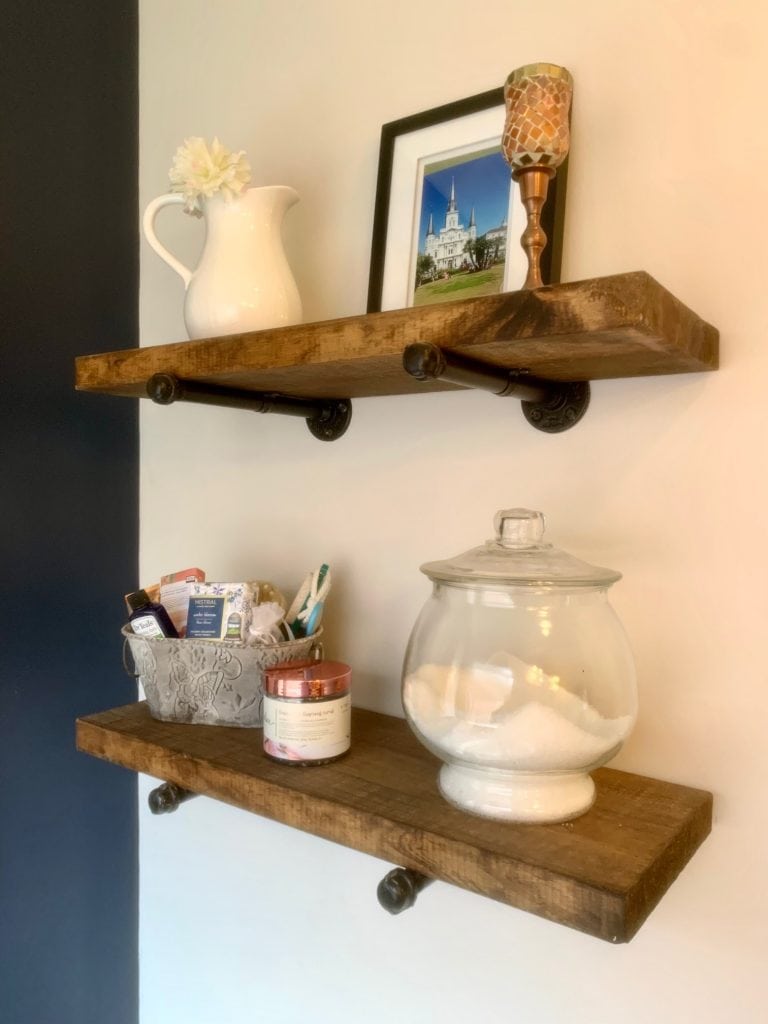
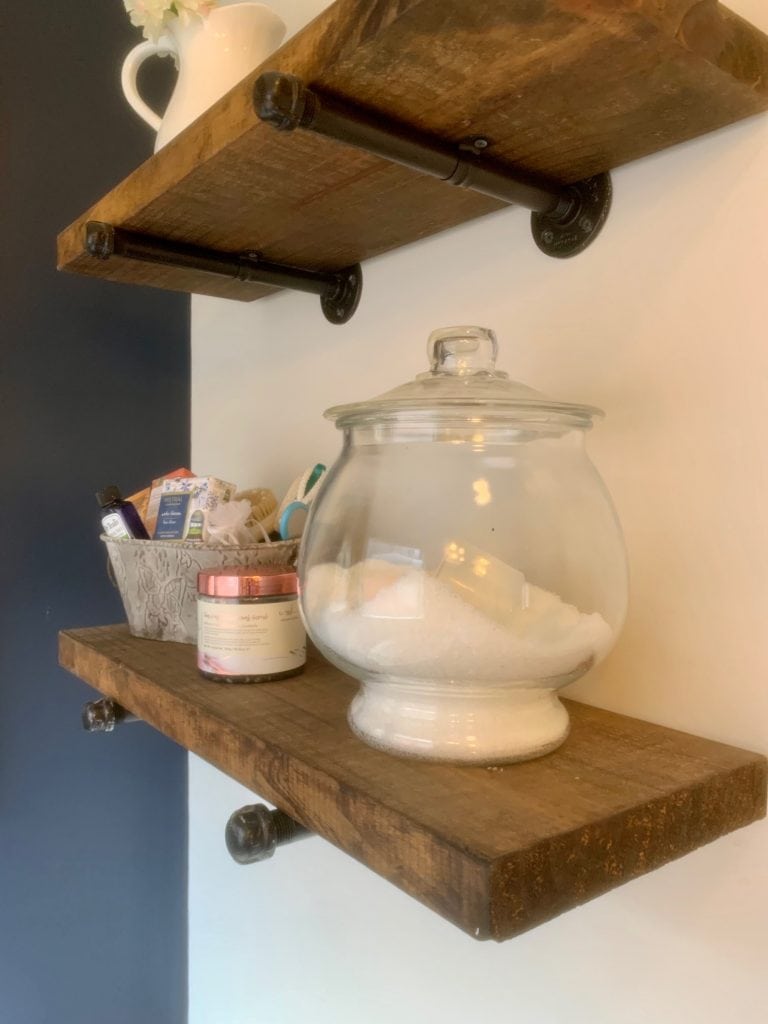
I have always liked the industrial pipe shelving look so this project was one of the first things I did in our previous home to add some shelving above the our master tub. It turned out great and looked so good in our bathroom. When we moved last year, we took the shelves with us to put above our tub in our new home because we loved them so much and they are easy to put together. The couple we sold our home to contacted us to ask how we did them because they wanted to re-create them above the tub themselves!
There are many different ways that you can do industrial pipe shelving. This is an easy industrial pipe shelving method to get the look in your home and you don’t have to have a ton of experience with building things.
Our shelves are 26 inches long x 10 inches deep. You can definitely do these shelves in a smaller depth (like 6 or 8 inches) if you need. You’ll just need to adjust the width board you purchase and the length of galvanized pipe for your needed depth.
What you’ll need for this project:
I found the items below at Lowes, but any hardware store should have these items. I’m linking what I can. The nipple fittings didn’t note the length of pipe online so I linked one for reference. You should find the proper link in store.
Tools needed for this project:
How to make industrial pipe shelving:
1. Determine the length shelf you need
First, you will need to determine how long you want your shelves to be and how many you are needing for your space. Once you know both of those things, you will know how many feet of wood you will need to purchase. Depending on the length of shelves you need, you may be able to find boards already cut to the length you need at the store. This is easy because then you don’t have to cut the boards down to length, but sometimes it is cheaper to buy one long board covering the total length of wood you need for all of your shelves and just cut into however many pieces you need. Compare pricing of both options and go with whichever you prefer.
2. Measure and cut your boards
If you have to cut your boards to length, take your tape measure and measure out your determined shelf length on the wood starting on the end of the wood. Use your pencil to mark the end of the shelf on the board. Remove your tape measure, take the speed square and place the wide, flat edge against the long edge of the wood. Line up the perpendicular edge over the top of the wood up against the mark you made at the end of your shelf length. Draw a line using the straight edge across the wood to give you a straight line and guide when cutting your wood.
Use a circular or table saw to cut your wood on your drawn line. Repeat these steps until you have all your shelves cut.
HELPFUL TIP
When purchasing your wood, you can ask the store if they can cut it to the length you need. The bigger stores will do this sometimes, so if you use a local hardware store it may not be an option. I have never personally used this service, but have seen people use it.
3. Stain your shelves
Once you have all of your shelves cut, set up an area for staining. You can use an old blanket, a box laid flat, or other cover that you don’t care if it gets stain on it. Shake and stir your stain in the can before using to mix the stain and any color that may settle. This way you get the best pigment of your stain color. I used Minwax oil-base stain in the color Provencial.
Take your rag or foam brush, dip into the stain and start spreading onto your boards. Work the stain in the direction of the wood grain majority of the time. It’s okay if you need to go the opposite direction some to move the stain around, but mostly work in the direction of the stain. Stain all sides, even the ends of your boards. I find you have to dab the stain more on the ends, especially if there is a “uncut” end that was the very end of the board. It tends to be more rough which makes it harder for the stain to spread over the area.
I like to stand boards up (on an end piece) to dry. Continue to stain and place for drying until all boards are complete.
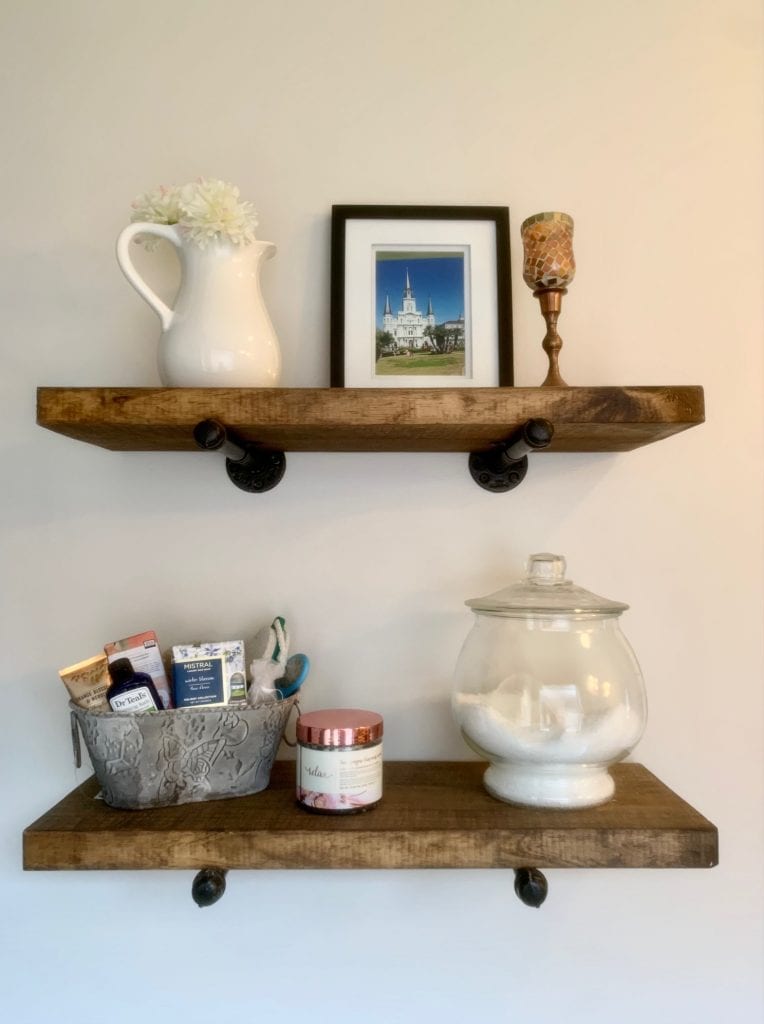
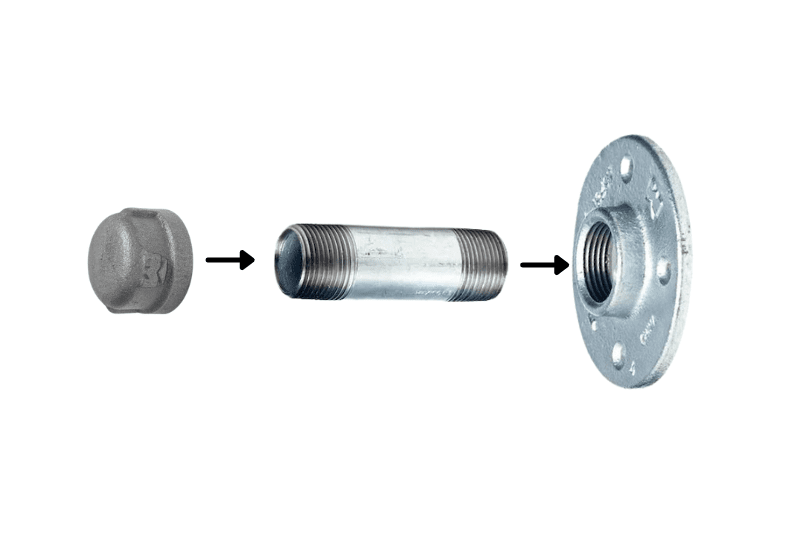
4. Put your pipe “brackets” together
- Place the galvanized cap onto one end of the pipe.
- Take the other end of the pipe and screw into the floor flange.
You have just put together your “bracket”. So easy! Put together remaining pieces until you have at least 2 brackets per shelf. *You may need 3 brackets for longer shelves.
5. Spray paint your pipe brackets + pipe straps (if necessary)
If you purchased the regular metal galvanized pipe and not the black, you will need to spray paint the brackets with bronze spray paint. This is what I did. After you put your brackets together, set up your brackets in the area that you did your staining. I recommend painting after you put them together because it is easier to paint all as one piece versus several smaller pieces, and if you paint them separately, it could make it harder to screw together as paint will build up in the ridges where two pieces will screw together.
Start spray painting one bracket making sure that you are not spraying too close to the pipe for there to be any drips. Make sure you get in all the tiny places, too! Continue until each bracket is painted. Don’t forget to paint the pipe straps!
Allow to fully dry before hanging your shelves.
HELPFUL TIP
When spray painting, spray with small back and forth strokes and release the nozzle at the end of each stroke. This helps get a smoother, more even coverage. Plus, you tend to use less paint because you’re not over-spraying!
6. Hang your shelves
Once the stain and brackets are dry, your shelves are ready for assembly!
- First, find where the studs are on your wall and the height of where you would like your bottom shelf to be. Mark each with a pencil on the wall.
- Once you have found the studs and determined your height, find the center of your wall and mark with a pencil.
- You’ll then want to line up the center of your shelf with the center of the wall and then see where the studs fall in the the length of your shelf. Ideally, you would like for your brackets to be on a stud to have the support and so you don’t have to use wall anchors, but it doesn’t always work out that perfectly.
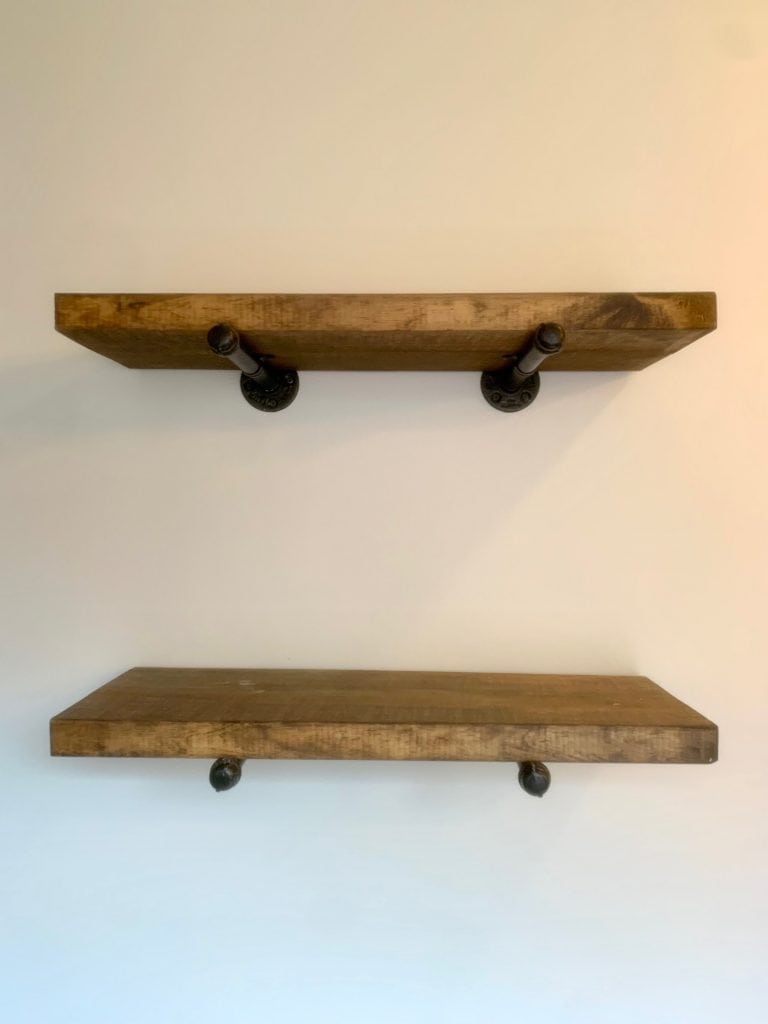
- For a 26 in long shelf, our brackets are 12.5 inches apart, which is a little closer than I preferred, but we were really trying to use part of a stud. In our previous home, it worked out better and they were a little farther apart, but this distance still looks good.
- Move the brackets around and determine a distance that you like and go with that.
- Once you determine where you want your bracket, line your bracket up with the top of your tape and mark with a pencil where the holes are in the flanges on the wall so you don’t lose your spot.
- Secure the brackets to the wall using your wall anchors (if necessary) and 1 – 1 1/2 inch screws, whichever length you prefer.
- Once your brackets are secured, place the shelf on top and line up the center with the center of your brackets. Check to make sure the shelf is level before moving on. Make adjustments, if necessary.
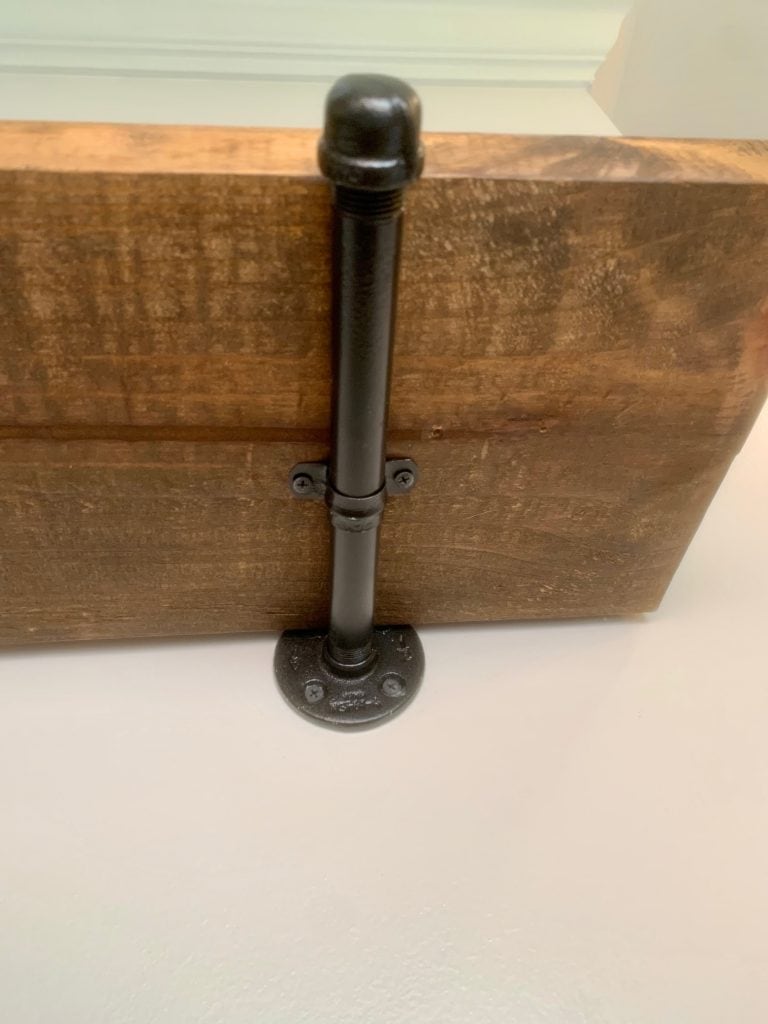
- Place the pipe straps on the middle of the pipe with the holes flat against the bottom of the shelf.
- Use your 1/2 inch screws and secure the pipe strap to the bottom of your shelf. The pipe straps secure your shelf to your brackets and keep it in place.
HELPFUL TIP
One you know the height of where you want your shelf, measure out the height from the floor on both ends of the shelf and make a mark on the wall. Using a level to guide, place painters tape on the wall with the top edge at your needed height . Line the top of the nipple fitting (bar shelf will sit on) up with the top edge of the tape.
Adding a second industrial pipe shelf?
From your bottom shelf, determine the distance you would like between your shelves. We used a 15.5 inch gap between our shelves.
- Measure from the top of the bottom shelf to your determined distance and mark this spot. This will become the bottom of your next shelf.
- You can use the painters tape method mentioned above here as a guide.
- Main thing is making sure the top of the bracket where the shelf will sit is at the line you determined for spacing (bottom of shelf).
- The floor flange will extend out on either side of the shelf (making the shelf sit lower than the top of the flange) and is not the true “top of shelf”. So, you don’t want to use the floor flange as your reference point for the shelf.
- Once you get in the proper place and alignment, repeat steps above to hang your brackets and attach the wood to the bracket.
Voila! Your shelves are ready for styling! This really is an easy way to incorporate industrial pipe shelving into your home. Let me know if you try them!